Your cart is currently empty!
Transform Your Garden: A Comprehensive Guide to Planting Potted Calla Lilies Outdoors

Introduction
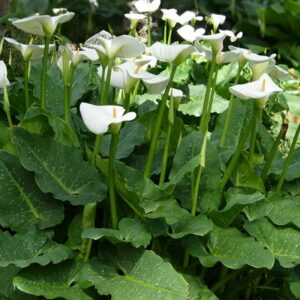
Calla lilies, also known as Zantedeschia, are captivating plants with stately blooms that bring an elegant touch to any garden. While they are often grown in pots, these versatile plants can also thrive when planted outdoors in the right conditions. This guide will provide you with all the essential information you need to successfully transplant potted calla lilies into your outdoor landscape.
Section 1: Choosing the Ideal Location
1.1 Soil Conditions
Calla lilies prefer well-drained, slightly acidic soil with a pH between 5.5 and 6.5. To improve drainage, amend the soil with organic matter such as compost or peat moss.
1.2 Sunlight and Shade
Calla lilies appreciate partial shade, especially during the hottest part of the day. They can tolerate full sun in cooler climates, but may need protection from strong afternoon rays.
1.3 Moisture
These plants require consistently moist soil, but not overly wet. Avoid planting them in areas that are prone to waterlogging or excessive drying out.
Section 2: Timing and Transplanting
2.1 Optimal Transplant Time
The best time to transplant potted calla lilies outdoors is in spring or early summer, after the last frost date has passed.
2.2 Step-by-Step Transplanting Process
- Dig a hole twice the width of the root ball and as deep as the root ball.
- Carefully remove the calla lily from its pot and gently loosen any compacted roots.
- Place the plant in the hole and backfill with soil, gently tamping it down to eliminate any air pockets.
- Water the plant thoroughly to settle the soil.
- Mulch around the plant with organic matter to retain moisture and suppress weeds.
Section 3: Post-Transplanting Care
3.1 Watering
Keep the soil consistently moist, especially during periods of drought. Avoid overwatering, as this can lead to root rot.
3.2 Fertilizing
Fertilize your calla lilies monthly with a balanced fertilizer. Avoid fertilizers that are high in nitrogen, as this can promote excessive foliage growth at the expense of blooms.
3.3 Mulching
Mulch regularly with organic matter to conserve moisture, suppress weeds, and regulate soil temperature.
3.4 Dividing
As your calla lilies mature, they may become overcrowded. Divide the clumps every 3-5 years in spring or fall to promote vigorous growth and flowering.
Section 4: Troubleshooting
### 4.1 Yellowing Leaves
Yellowing leaves can indicate overwatering or nutrient deficiency. Check the soil moisture levels and fertilize accordingly.
### 4.2 Brown Leaf Tips
Brown leaf tips suggest underwatering or sunburn. Increase watering frequency and provide shade during the hottest part of the day.
### 4.3 Lack of Blooms
Insufficient sunlight, inadequate fertilization, or poor soil conditions can hinder blooming. Ensure your plants receive enough light, fertilize regularly, and check the soil pH and drainage.
Section 5: Conclusion
By following these guidelines, you can successfully transplant potted calla lilies outdoors and enjoy their elegant blooms throughout the season. Whether you are a seasoned gardener or a novice, this comprehensive guide will empower you to create a stunning and vibrant landscape.


Leave a Reply